
Sponsored article
A perfectly even and aesthetic driveway in front of the house is the pride of the family nest. Even a beautiful, luxurious villa will be disfigured by an unfinished, neglected driveway. Paving blocks are not only aesthetically pleasing but also very effective and durable material for a driveway. Cobblestones, with a bit of proper care, will not be destroyed by the wheels of passing cars, and the car chassis will be grateful for an even surface. See step by step how to lay cobblestones to have a perfectly even driveway.
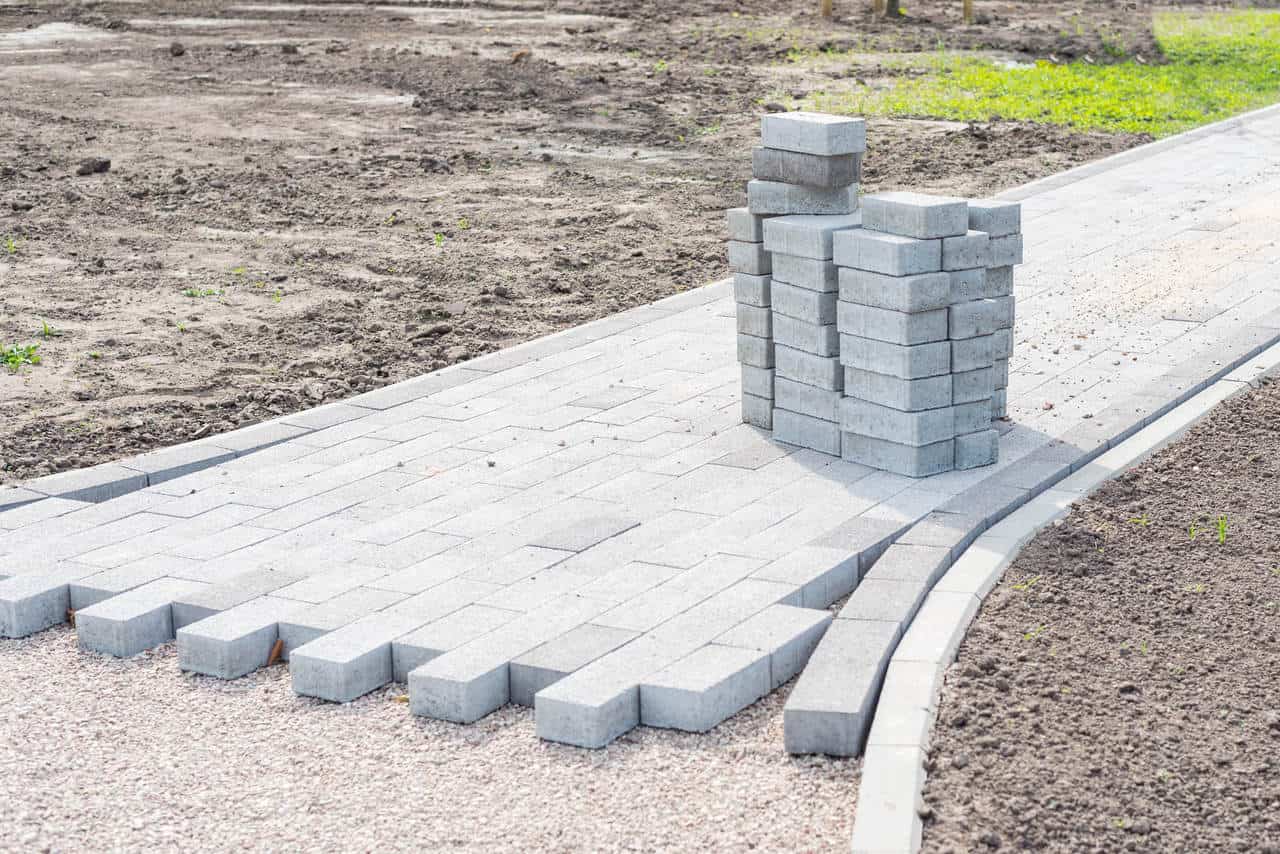
Before you start laying paving stones, you have to prepare the ground for the work. You need to dig an appropriately deep depression in the ground, its depth depends on what kind of traffic is expected in the area. If it is a driveway where cars are expected to move and park regularly, the pit must be at least half a meter deep, while a path leading from the driveway to the house only needs a 15-20 centimeter pit. If the surface of the driveway is small, you can easily do this work by hand, but for larger areas it is worth hiring or buying paving tools
In order for the paving blocks not to sink or move during use, they have to be laid on a properly prepared foundation. The foundation for a paving block driveway is the key to its success. The success of the whole further process depends on its quality and workmanship. It is not worth saving on it because if you want to save a few pennies you can spoil the whole project and throw the money invested in the drive into the trash. The thickness of the substructure should be chosen according to the humidity of the ground (the wetter the ground, the thicker the substructure) and the purpose of the surface, i.e. its use. The best materials for the substructure are aggregate such as, for example, ballast, gravel, grit, cinder or wedge.
The cement and sand bed is to harden and stabilize the driveway, which will be put to many tests every day. In order to keep the paving blocks in place even under higher loads that occur on driveways, a sand and cement sub-base should be laid under them in the ratio 1:12. About 15 centimeters of the sand and cement sub-base is sufficient for a driveway used by passenger cars.
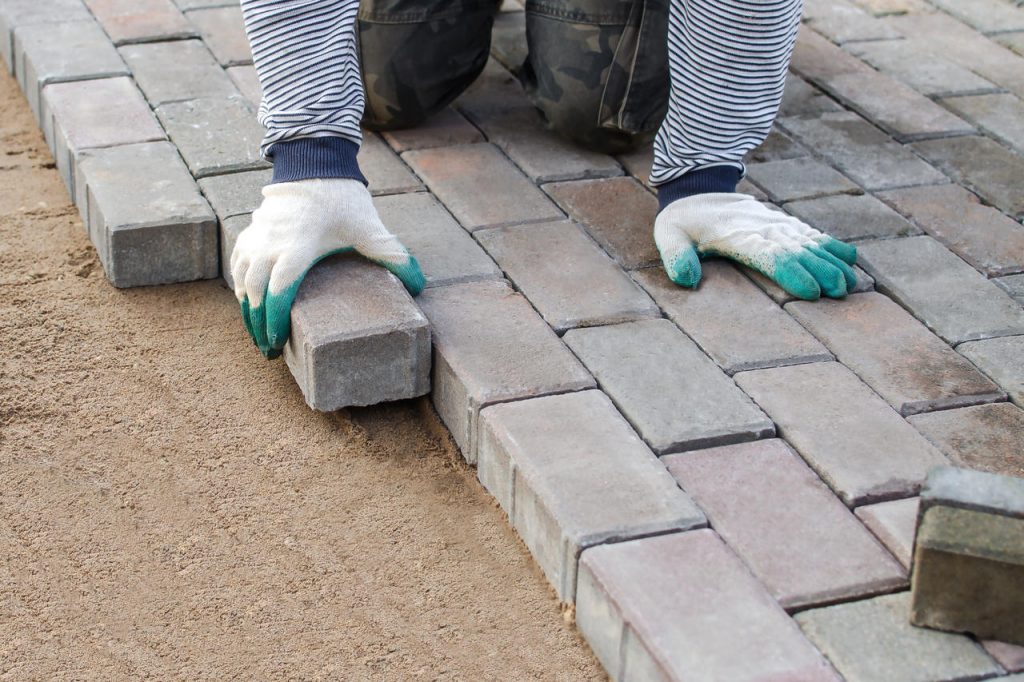
With the base properly prepared, you can safely proceed to the last step, that is laying paving blocks. A rubber mallet will come in handy in this step, with which you will have to hammer the paving blocks into the ground. Why does the hammer have to be rubber? An ordinary steel hammer might damage the paving blocks, cause chips and holes in them, while a rubber hammer is completely safe for the paving stones. The elements of the driveway should fit tightly and evenly to each other, do not leave any empty spaces between them. Connect the laid surface permanently with a surface vibrator, secured with a rubber pad so that it does not damage the surface of the paving blocks.
Sprinkle sand on the freshly laid paving blocks to stabilize them, make sure that it reaches every gap between the blocks, and voila! Your driveway is ready. Just remember to clean and maintain your paving blocks properly, so that they will serve you for years. Stubborn engine oil stains, that often appear on driveways, can be removed with warm water and a dishwashing liquid.